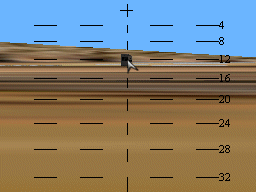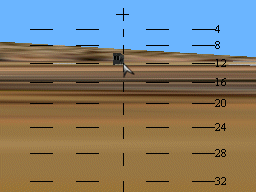
by ZazenOk, here it is, by popular demand, the key, the secret, the way to consistently kill at high deflection in an Ostwind. I write this for one reason and one reason only: to make vulching, which is just spawn camping planes with planes, as unpleasant an experience as possible and totally non-viable as a method to pad fighter scores. There are a few things to note. First, always park your Ostwind on concrete somewhere. Second, always have your clipboard open and your mouse cursor on the Tower button so you can end mission quickly if you hear ordnance about to plop on your head. Third, learn where to park your Ostwind. In AH2 there are two main places to park it: near, but not too near, the Fighter Hangers, and near the tower on a small field or near the nexus of runways at a medium or large field for vulcher slaying. In some situations you may not want to park at all, such as when there are no friendly aircraft to amuse the vulchers, in this situation go up and down the runways in 5th gear maintaining a straight line path to make compensating for your own movement as easy as possible. As far as aiming goes, the core principle is rather simple, some may have already heard me state it. Always fire fully zoomed in. While fully zoomed in, a target traveling roughly parallel or perpendicular to the ground at a range of 1k will be hit if kept exactly at the edge of your screen. Therefore a target 500 away should be kept halfway from the edge of your screen to your crosshair. This is the basis for all shots. Now off angle shots you must judge by the aircraft's attitude, speed and size as to how much extra or less to lead it relative to the base amount, always leading in the direction of the target plane's nose. Always lead your target slightly more than you think you should and slightly above to allow for shell drop, and keep your turret swivel motion as smooth and fluid as possible. On large targets and slower than average targets lead a little less, on small and fast targets lead a little more. Another thing to realize, while an Ostwind shell can technically kill at distances approaching 3k, never ever fire over 1.5k for one simple reason. The smoothing code or whatever does an adjustment at 1.5k; you will notice a small burp or hiccup in the planes position so at distances over 1.5k you are not actually seeing the plane where it really is. You'll notice this effect on bombers, it is especially pronounced with the drones in a formation. I almost never shoot beyond 1.2k on anything that isn't just coming directly at or away from me. The 1k distance is really where you want to be firing; it's the key to accurate deflection shooting in the Ostwind. To sum this up really simply:
This only works if you are Fully Zoomed in! (of course you do your scanning un-zoomed). Only fire fully zoomed in, there is no reason to fire partially zoomed in. I have experimented with this at various resolutions. There is no difference between where the shell goes relative to the centerline position fully zoomed in or fully zoomed out, however at some resolutions there is a difference if only partially zoomed in. My guide only works if you are fully zoomed in when firing. I've tried it at everything from 800X600 to 1600X1200 on a 17" screen to a 21" screen it works the same. If there is any difference it's so small as to be within the shell's trajectory margin of variability and irrelevant. I also recommend being fully Page-Up'd by default. One thing to realize when shooting is there is a fairly large 'spread'. The key to hitting any target, but especially those heading generally toward and away from you is to lead their nose not where the plane appears to be. This is especially true on planes heading away from you as your shell takes quite some time to get there relatively speaking. So, in your example where he just flew over you and is heading away if he is shallow diving to deck lead below him, but if he's shallow climbing lead above him. You judge by how much by watching his nose attitude and the distance, the further away the more lead to compensate for the shell drop. The shell drop to targets up to 1k away is fairly insignificant, over that distance it becomes increasingly and incrementally more significant. The amount the shell drops under 1k is smaller than the variability of the 'spread' to you can aim a hair above but not more if you want but usually you don't need to. The faster the plane is going the more you have to lead relative to the base amount. A bandit going 500mph but 800 away you will have to have him about on the edge of the screen as if he were going 300'ish but 1k away. Conversely, a bandit going only 200 mph but 1k away you only need to lead him 3/4 of the way to the edge. It's something you have to get a feel for, but as I stated in the original post, smaller and/or faster targets lead more than the base amount, slower and/or large targets lead less. My formula in the original post is based on an average plane like the P51 going an average speed of 325'ish. The Field gun is EXACTLY the same in every way to the Ostwind as far as aiming is concerned. The only differences are: 1) The field gun seems to be more accurate, has less spread and slightly longer effective range. This is probably due to a significantly longer barrel and being in a fixed position as opposed to a less stable vehicle platform. 2) The field gun has a slightly slower rate of fire, this means a target is more likely to, "Thread the needle", between your stream even if your lead is perfect. 3) The field gun has better 360 degree visibility as there is no tank chassis and turret housing to obstruct your view. So, it is much easier to maintain situational awareness, as it were, in a field gun. 4) Obviously the field gun is much easier to kill, a single cannon round even close to a field gun will blow it, but then again you can't 'die' in a field gun either... As far as aiming as illustrated in my original post there is absolutely no difference. If you are good in an Ostwind you will be good in a field gun and vice versa, it's the same 37mm cannon. Hope this helps! Death to vulchers! |
by HammerGround vehicles can perform many functions in Aces High. They deliver troops and supplies, defend bases from both air and ground attack, and they can add an important element to an attack. Still, many people are unsure of how to properly utilize ground vehicles and what rules apply to them. The purpose of this write up is to try and answer some of the questions about both the mechanics and tactics of using ground vehicles in the Aces High arena.
The Vehicles
Ground Vehicle SortiesGround vehicles are available from airfields, ports, vehicle bases, and, in the case of LVTs, from carrier task groups. Just as with aircraft sorties, you select your vehicle and its loadout from the hangar. Your loadout options include fuel load and how many of each type of ammunition you carry:
By right-clicking on the map and selecting "Vehicle Spawns", your map will display the spawn points possible from all bases. This will look similar to the image at the right. The lines originating from your current base terminate at arrowheads indicating the spawn points. Purple lines into the water indicate spawn points for PT boats. These spawn points, whether from your base or an enemy's, are safe places to "land" you mission successfully without getting a ditch.
Controlling Ground VehiclesAll ground vehicles and PT boats are controlled in the same way. It's a good idea to setup Control Mode 2 for GVs since this is the default mode if you use "Auto-Select Mode". Click Aces High Help - Flight Controls - Joystick Setup and Calibration for instructions on setting up various control modes. The original ground vehicle system and mouse function within the game were changed in an update. NOTE: The mouse cursor will only appear and function when the clipboard is active or when the radio bar is open. Your mouse now defaults to mouse look when you are piloting a plane or to gunner control when you are in a gunner position. You can toggle mouse look with <Shift M> or disable or enable it to default on in the Options/Preferences/View Options menu. This may not be defaulted on if you have modified your View Options in the past. You can also set the sensitivity of your mouse look in this menu. Gunner positions can now be controlled with either the mouse or the joystick. Both controls are live at the same time so you don't need to switch modes to switch controls. Vehicles are now controlled with the W, A, S, and D keys. This allows you to be able to completely control the vehicle while manning a gunner station. A and D controls left and right turns and W and S controls acceleration and deceleration. Holding down the S key will also shift into reverse. Pressing <Shift W> will accelerate your vehicle to full speed without having to hold down the W key. Pressing <Shift S> will bring your vehicle to a full stop. Gear shifts take place automatically. All tanks with turrets and tank sights now have a commander's position in place of the driver's position. The commander's position can use the mouse or joystick to slew the turret. Vehicles with commander's positions can only attach a second player as an observer and not a gunner.
Tank Sights
The German and Russian tanks are using sights with adjustable reticles. You can dial in the range of the sight using the C and V keys or the mouse wheel if mapped. Different tank sights have different magnifications and field of views. Most tank sights are a single fixed power but some tanks (Tiger, Panther, Firefly) have a second magnification range that can be toggled using the zoom (Z) key. Tanks with coaxial machine guns and hull mg's no longer have a gunner position for the hull. It is instead slaved to the coax gun and will fire whenever the coax is fired within the hull gun's field of fire. The Panther and Tiger now have reversing tracks that allow them to pivot in place. Just hold down the A or D key with the engine running while you are stopped. All ground vehicles have at least one weapon system. Many have several. The gun positions on ground vehicles are manned by pressing the appropriate number key on your keyboard. In all vehicles, the primary weapon is the [2] key and additional weapons go up from there. Like bombers, the [1] key takes you back to the driver's position. While manning a gunner's position, you can continue to steer the vehicle by using your rudder controls. You can not, however, increase or decrease speed or shift gears from a gunner's position.
Driving Hazards
Ground vehicles are susceptible to destruction from wrecks and roll-overs as well as enemy action. The faster vehicles (M-8, M-3, M-16) can easily roll over during sharp turns. The tracked vehicles are less susceptible to rolling over but can do so, especially if going down hill at high speed. Vehicles also seem prone to roll over when hitting an immovable object such as a tree or a bridge. While you can drive over small bushes and clumps of grass, full sized trees, as well as buildings and field objects, will stop you and, as noted above, often roll you over. All forests have multiple paths through them which can be negotiated instead of going around. It's well worth the time to look for these paths and the trees give you some cover from aerial attack, too. Hills can also present obstacles. Some vehicles can negotiate hills better than other. In some cases, a vehicle can back up a hill which it can't negotiate going forward. If you are really stuck, you can give it a try. Ground Vehicle GunneryGround vehicles are armed with 3 basic types of weapons: machine guns, automatic cannons, and single shot cannons. Machine guns and automatic cannons have open sights while the single shot cannons in the game have an optical sight of some sort.
Open Sights
Open sights are fairly easy to use. You line up the (not moving) target with the crosshairs and fire away. If the rounds are short, you simply elevate until they are on target. The recoil of the guns do not affect the sight picture significantly and the rapid rate of fire allow them to be easily kept on target since rounds are constantly impacting. While this is fairly simple, there are some techniques which can improve your view from these positions while still maintaining accuracy.
Optical Sights
The basic operation of the sight is simple: put the center line on the target at the appropriate range and pull the trigger. In practice, it is much more difficult. Enemy ground vehicles do not show an icon or range information. This makes it difficult to determine range for your initial shot. While experience will help you make that initial range estimation, you can still get on target with just a few shots. As with the open sights, using your cursor is the key to getting results. When a cannon fires, its recoil is strong enough to move the entire vehicle. When everything is finished moving, your sight picture will not be where it was when you started. The images below show a before and after sight picture from a stationary Panzer IV H. Note how much the sight moves after taking a shot. By taking a second or two to place your cursor on your target before firing, you have a ready reference point to adjust your fire from. Simply move the cursor back onto your target, then add or subtract elevation as necessary. The same goes for lead on moving vehicles.
The cursor also gives you a better aiming point when firing from a moving, bouncing vehicle. Once you are getting hits, fire when the cursor is on the target. TacticsSituation AwarenessJust like planning a fighter or bomber sortie, the first step to a successful vehicle sortie is situation awareness. Situation awareness is harder to develop for GV missions than it is for aircraft missions. First of all, GVs are not indicated on radar so you can not determine how many or even if there are enemy GVs at your target. You may not even be able to tell if there are friendly GVs there. A flashing enemy base with no friendly cons visible on radar is an indication there may be friendly GVs there. If there are people in the tower where you are starting, especially if you are at a vehicle base, ask questions about what is going on. Especially important is whether or not there are spawn campers (someone who sits at a spawn point and kills GVs as they appear) at the spawn point. If there are, chances are you will have a short mission unless you can get enough people to spawn simultaneously to overwhelm the camper. After you spawn, you must quickly develop your situation awareness of the local area. You start in the driver's seat. Do not start your engine! If there is a spawn camper there, he will most likely get you before you move, anyway, so you might as well develop your local situation awareness. Jump to your pintle machine gun (if so equipped) or to a position that allows you a full 360* view and listen for engine sounds. If you are the only friendly GV and you hear vehicle engine sounds, you know there is an enemy out there somewhere. You can figure out the general direction of the enemy GV by slowly rotating your view until the sound moves from one speaker to the other. Then move it back until the sound is coming equally from both speakers. You now know which direction the moving GV is! Unless there are other friendlies, either GVs or planes, in your area, you have developed your situation awareness about as far as it can go. It's now time to move out. Route Planning and MovementThe most common route people take when GVing is to go in a straight line from the spawn point to the targeted field. That is the most likely avenue of approach and likely the only one the enemy has a defense on. It is very easy for defenders to set up an ambush for you even if they are not spawn camping. A more practical (and survivable) route is one that circles around the direct route. This is especially true if you are alone or with only 1 or 2 other GVs. It will cost you time to take a more indirect route, but it will probably get you behind the defending enemy. Take advantage of the terrain as you drive along your selected route. Don't crest the small ridges, drive around them. Take advantage of the woods to help protect you from attack and detection. Move quickly from cover to cover and concealment to concealment. Stop often and observe the tree lines and terrain features around you. Shut your engine down and listen for engine noise. It won't help much if the enemy is already in position, but you might catch him moving up. Coordinate with those around you to stop and listen at the same time so you know any engine noise is enemy. If possible, have a wingman (yes, tankers call them wingman, too) to cover you while you move. When moving with a wingman, one moves while the other is stationary watching and listening for enemy. This is called over-watch. The over-watch tank should be able to see any likely positions which can engage his moving wingman as the wingman moves from one position to the next. The wingman then takes up over-watch. Hopefully, this gets you in a position to engage the enemy before he engages you. EngagementsThe first thing to do when engaging another ground vehicle is to compare your vehicle's capabilities to your enemy's and decide on appropriate tactics. A lightly armored vehicle can't sit still and slug it out with a Main Battle Tank (MBT) and a MBT moving at top speed will rarely hit its target except at extremely close range. In general, if you are in a heavily armored vehicle (tank, Ostwind), you will want to put the front of your vehicle towards the enemy. On most armored vehicles, the armor is thickest in the front so putting the front of your hull towards the enemy gives you the best protection and the best chance of surviving hits from his weapon. Once you are lined up, bring your large weapons onto target and blast away. These vehicle's slow speeds are not much protection from the weapons of other vehicles and their weapons are not well suited for firing on the move except at fairly close range. If you are fighting against a tank that out-guns you (i.e. Pnzr vs Tiger), your best bet is to use available cover and concealment to maneuver within range where your guns can be effective against the target. If you are in a lightly armed and armored but fast vehicle, you will want to keep moving fast and work your way behind and close to your target where your weapons have a change of making a kill. Use terrain and any cover and concealment (trees, buildings, hills, smoke rounds, etc) possible to mask your move while you move in. Once at close range at the angle you want, blast away. While it is rarely done, having a gunner in this situation can be beneficial as it allows you to take the shot and move out more quickly once the shot is taken.
Attacking Buildings
The chart below shows data provided by MOSQ showing the effectiveness of the various GVs in taking down town buildings.
|
Flight Instruction
Courtesy of Zeno's Warbird Videos
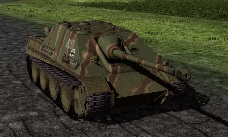 Jagdpanther - The Jagdpanther combined the very powerful 88 mm PaK 43 cannon of the Tiger II and the characteristically excellent armor and suspension of the Panther chassis. The Jagdpanther had a good power-to-weight ratio and a powerful main gun, which made it very effective against any type of Allied tank.
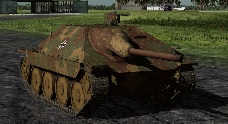 Jagdpanzer 38(t) - The Panzer 38(t) was a conventional pre-World War II tank design, with riveted armour and rear engine. The riveted armour was mostly not sloped, and varied in thickness from 10 mm to 25 mm in most versions. Later models (Ausf. E on) increased this to 50 mm by bolting on an additional 25 mm armour to the front. Side armours received additional 15 mm armour from Ausf. E onward. The small turret of the Panzer 38(t) was incapable of carrying a gun big enough to destroy more modern tanks such as T-34, so manufacturing of the tank version ceased in June 1942.
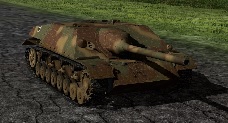 JagdpanzerIV 70 - The Jagdpanzer IV used Panzer IV chassis 7 (known as BW7), but the almost-vertical front hull plate was replaced by sloped armor plates. Armament consisted of a 7.5 cm main gun, originally intended to be the Pak 42 L/70, but due to shortages older guns were initially used, the 75mm Pak 39 L/43 for pre-production, and the 75mm Pak 39 L/48 for initial production variant. These were shorter and less powerful than the Pak 42. Installing the much heavier Pak 42 meant that the Jagdpanzer IV was nose heavy, especially with the heavy frontal armor. This made them less mobile and more difficult to operate in rough terrain, leading their crews to nickname them Guderian-Ente ("Guderian's duck").
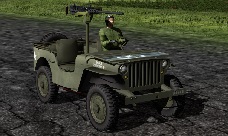 Jeep - The Jeep is an unarmored vehicle armed with a pintle mounted .50 caliber machine gun. The jeep is the fastest vehicle in the game and relies on that speed in lieu of armor to keep it safe. The jeep can carry supplies or 3 troops, meaning it takes more than 1 to capture a base.
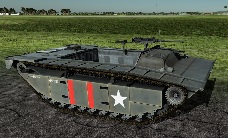 LVTA2 - The U.S. LVTA2 is an amphibious tractor armed with a pintle mounted .50 caliber machine gun and a pintle mounted .30 caliber machine gun. Capable of delivering troops and supplies from a carrier group, it is used to capture bases during a carrier attack.
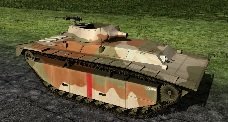 LVTA4 - The U.S. LVTA4 is an amphibious tractor armed with a 75mm howitzer mounted in an open-topped turret and a pintle mounted .50 caliber machine gun. Able to be launched from a Carrier Task Group and drive across the water, the A4 is rarely used in the main arena. Its howitzer is of little use against other vehicles. It can take down hangars and town buildings, but there are more efficient ways of doing this if there is a functioning carrier close by.
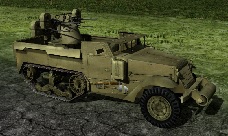 M-16 MGMC - The U.S. M-16 Machine Gun Carrier is a lightly armored, half-tracked vehicle armed with 4 x .50 caliber machine guns mounted in an open turret in the rear. It is a fast, highly effective anti-air platform but its light armor and machine gun armament make it no match for the other combat vehicles unless it is extremely close. The same challenges the Ostwind has in aiming at aircraft apply to the M-16.
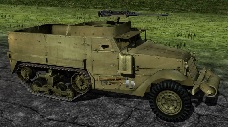 M-3 - The U.S. M-3 is a fast, lightly armored, half-tracked vehicle capable of carrying troops or supplies. Your countryman in a Tiger with its tread blown off will be eternally grateful when you deliver vehicle supplies to him, allowing him to continue his mission and keep his perk points. Depending on the location of the spawn points, it can be a faster and safer way to deliver troops or supplies than a C-47. It can also sometimes sneak into a base undetected while enemy airplanes are watching for C-47s. The M-3 is armed with a .50 caliber machine gun.
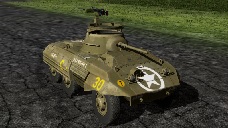 M-8 - The U.S. Army's M-8 Armored Car is a fast, lightly armored wheeled vehicle capable of rapid cross-country movement. It is armed with a 37mm cannon with 80 rounds of either HE or AP and a pintle-mounted .50 caliber machine gun. The M-8 is of limited use in the arena. Its main gun can kill a tank, but it must hit it from behind to be effective and its single machine gun is only marginally effective against aircraft. Stay fast and work in close to your target.
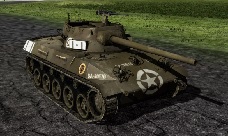 M-18 Hellcat - The M18 Hellcat (also known as the M18 Gun Motor Carriage , M18 GMC) was an American tank destroyer. It was the fastest armored vehicle in the American defense inventory. The Hellcat holds the record for most effective American tank destroyer during World War II
 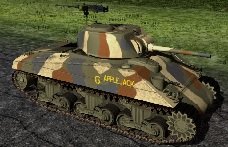 M4A3 75 - The M4 Sherman tank was the most common Allied tank in WW2.Produced in several variants it was also the basis for a number of related vehicles. It's better suited for attacking buildings instead of other tanks when fitted with the 75mm gun.
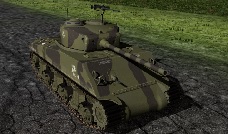 M4A3 76 - Shermans often found themselves up against enemy armor and fitting the 76mm gun improved performance, the vehicle's mobility and protection was also increased. This version can also carry smoke grenades and 2 .30 cal and 1 .50 cal machine guns.
 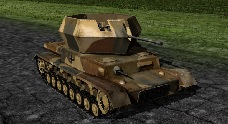 Ostwind - The Ostwind is a Panzer IV chassis armed with a 37mm automatic cannon in an open turret and a hull mounted machine gun. It is an effective anti-aircraft gun and can also destroy other ground vehicles, especially the lightly armored ones like M-8s, M-16s, M-3s and LVTs. Due to its high explosive ammo's lack of armor piercing capability, it is not as effective against the main battle tanks (MBTs) but can immobilize them by destroying a track. Aiming at aircraft can be a challenge, especially against targets moving across your position.
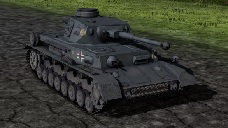 Panther G - The Panther was a compromise. While having essentially the same engine as the Tiger I, it had more efficient frontal hull armour, better gun penetration, was lighter and faster, and could traverse rough terrain better than the Tiger I. The trade-off was weaker side armour, which made it vulnerable to flanking fire. The Panther proved to be effective in open country and long range engagements.
 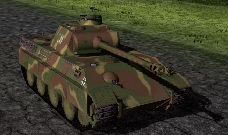 Panzer IV F - Designed as an infantry support tank, the Panzer IV was not originally intended to engage enemy armor—that role being allocated to the Panzer III. However, with the inadequacy of the Panzer III becoming apparent and in the face of Soviet T-34 tanks, the Panzer IV soon assumed the original role of its increasingly vulnerable cousin. The Panzer IV was partially succeeded by the Panther medium tank, which was introduced to counter the T-34, although the Panzer IV continued as a significant component of German armoured formations to the end of the war.
 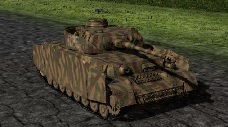 Panzer IV H - The German Panzer IV H is equipped with a 75mm high velocity cannon. It can carry 87 rounds of AP, HE, or smoke in various combinations. The Panzer has declined in popularity since the introduction of the Firefly, which out-classes it in almost every way. The Panzer is effective against all ground targets, even the Tiger if you hit first from close and in the right place! Like the Tiger, the Panzer can be effective against buildings and objects as well as other vehicles
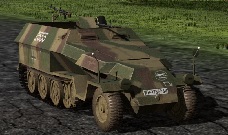 SdKfz251 - The Sd.Kfz.251 German halftrack was an armoured fighting vehicle built by Germany during World War II. The initial idea was for a vehicle that could be used to transport a squad of troops to the battlefield protected from enemy fire. The open top meant that the crew was still vulnerable. Although designed for cross country work, the German halftrack had some limitations as the front wheels were not powered. The standard personnel carrier version was equipped with a 7.92mm MG34 or MG42 machine gun mounted at the front of the open compartment, above and behind the driver.
 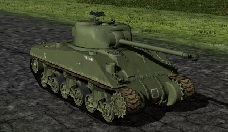 Sherman Firefly - The Sherman Firefly is a late war British variant of the Sherman tank with thicker armor and a British 17-pounder anti-tank cannon. It is the first tank to offer a challenge to the Tiger in a one-on-one battle. While its armor is not quite as thick as the Tiger's, the Firefly is faster and its gun gives it the ability to destroy any other tank in the game. Capable of carrying XX rounds of ammunition in AP, HE, or smoke in various combinations.
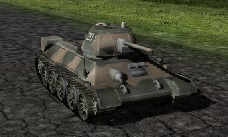 T-34/76 - The first vehicle added in Aces High II, the Soviet T-34/76 is equipped with a main armament of a 76mm anti-tank cannon. It is faster than the Panzer IV or Tiger and has better front armor (due to sloping) than the Panzer, but its main gun has less armor penetration than the other two tanks and requires twice as long to reload. It also lacks any anti-air capability as it has no pintle-mounted machine gun. Still, its faster cross-country speed should make it a popular choice in the main arena.
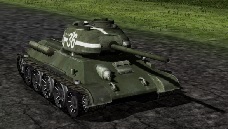 T34 85 - The T34/85 is a variant of the early war T34/76. The T34/85 brought multiple improvements including a redesigned turret to improve crew comfort and effectiveness. This new turret houses the ZiS-S-53 85 mm gun and features a 3 man crew (Gunner, Loader, Commander). Reload times are greatly reduced from the early 76mm version. Armor levels are average for a main battle tank in World War II, however because of its sloped armor it will sometimes shrug off large caliber hits. While the T34 does cause many rounds to bounce off harmlessly, an experience tank commander knows the T34's weak spots and a direct hit to these areas by nearly any tank killing weapon will destroy or disable the T34.
 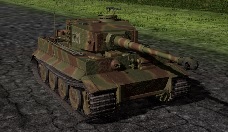 Tiger - The first perked ground vehicle, the German Tiger I is equipped with an 88mm cannon and carries 92 rounds of armor piercing (AP), high explosive (HE), or smoke (SMK) in various combinations. Protected by exceptionally thick armor, it is a formidable foe for other ground vehicles and a difficult target to destroy from the air. As the heavyweight of ground vehicles, the Tiger does not require a great deal of tactical thinking. Point the massive 88mm at your target and blow it away! The Tiger easily out-classes other ground vehicles and its high explosive shells are effective against hangars as well.
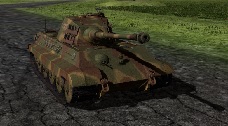 Tiger II - The Tiger II was the successor to the Tiger I, combining the latter's thick armor with the armor sloping used on the Panther medium tank. The tank weighed almost 70 metric tons, and was protected by 100 to 180 mm (4 to 7in) of armor to the front. It was armed with the long barreled 88mm KwK 43 L/71 gun which was very effective against other tanks. The chassis was also the basis for the Jagdtiger turretless tank destroyer.
 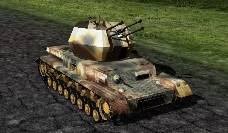 Wirblewind - The Flakpanzer IV "Wirbelwind" (Whirlwind in German) was a self-propelled anti-aircraft gun based on the Panzer IV tank. It was developed in 1944 as a successor to the earlier self-propelled anti-aircraft gun Möbelwagen.As the 20MM shells used proved less effective against aircraft than 37MM shells, the Wirbelwind was eventually replaced by the Ostwind which was equipped with a single 37MM FlaK 43. The rapid fire from the four guns of the Wirbelwind is very effective against buildings.
 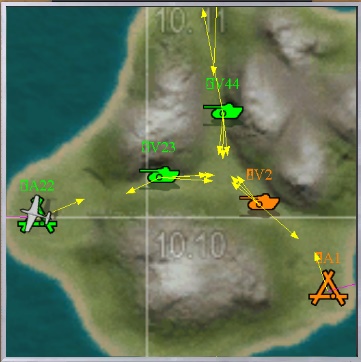 Once you have selected your vehicle and its loadout, go back to the tower and look at your map.
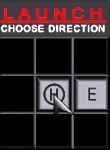 Once you have selected where you want to go, you select that spawn point just like you select a runway for your airplane: by clicking on one of the direction buttons at the bottom left of your clipboard. The image above on the right shows the GV spawn points for field A54. The relationship between the spawn point buttons and the actual spawn points is not always as clear as it is in this example. Make sure you check your map as soon as you spawn to ensure you are where you want to be.
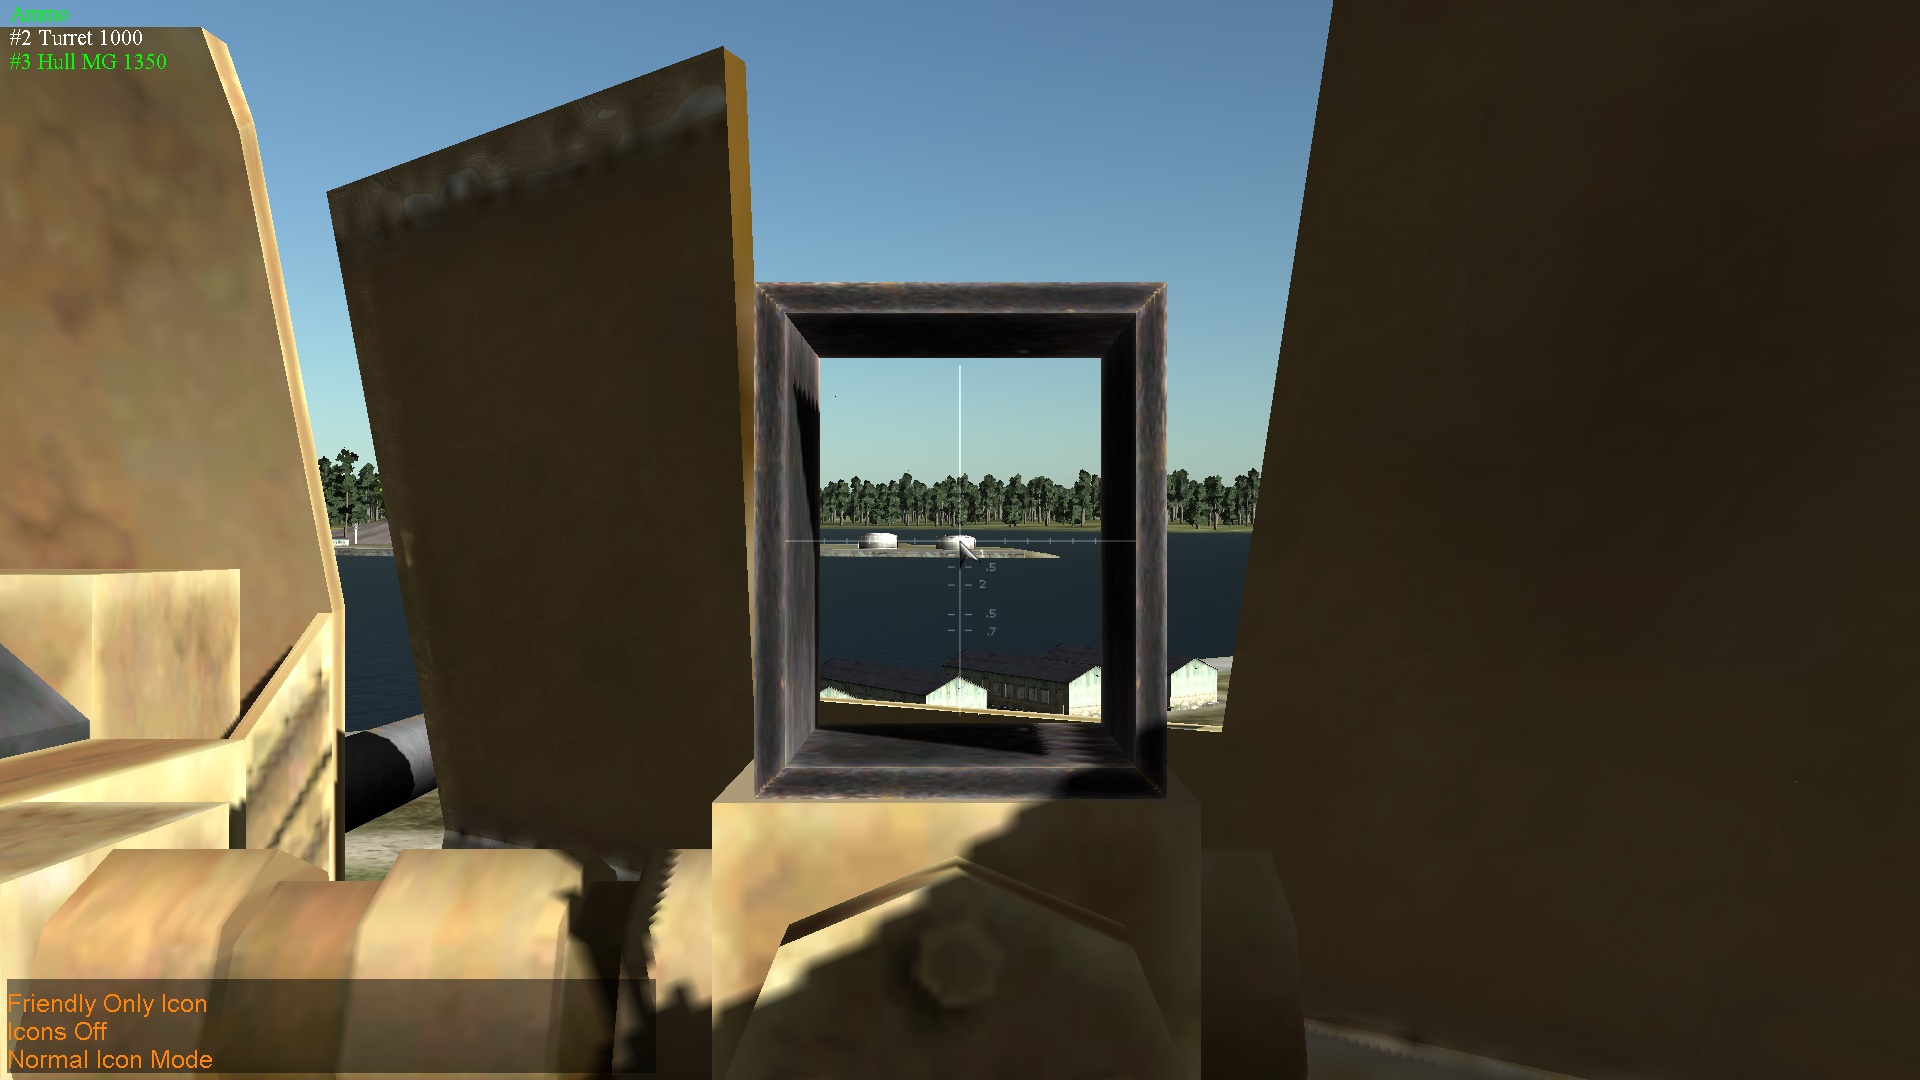
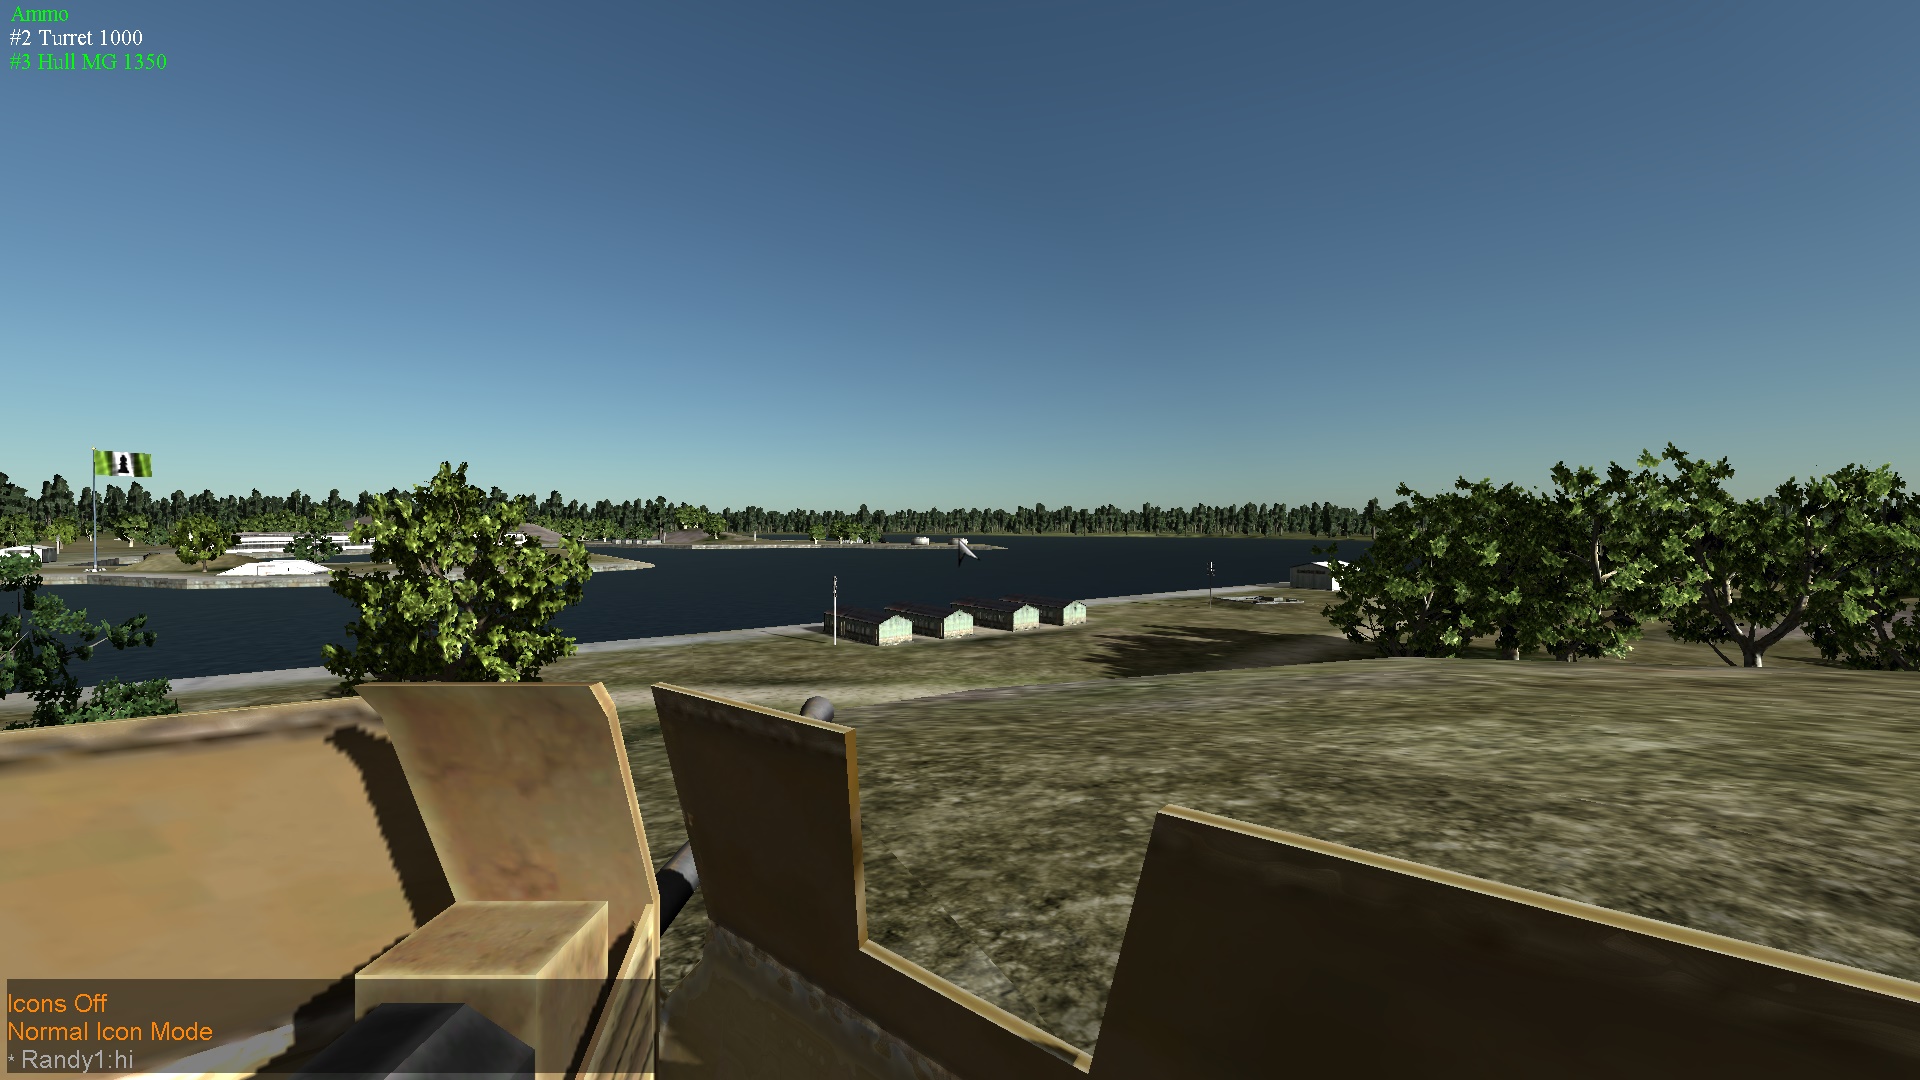
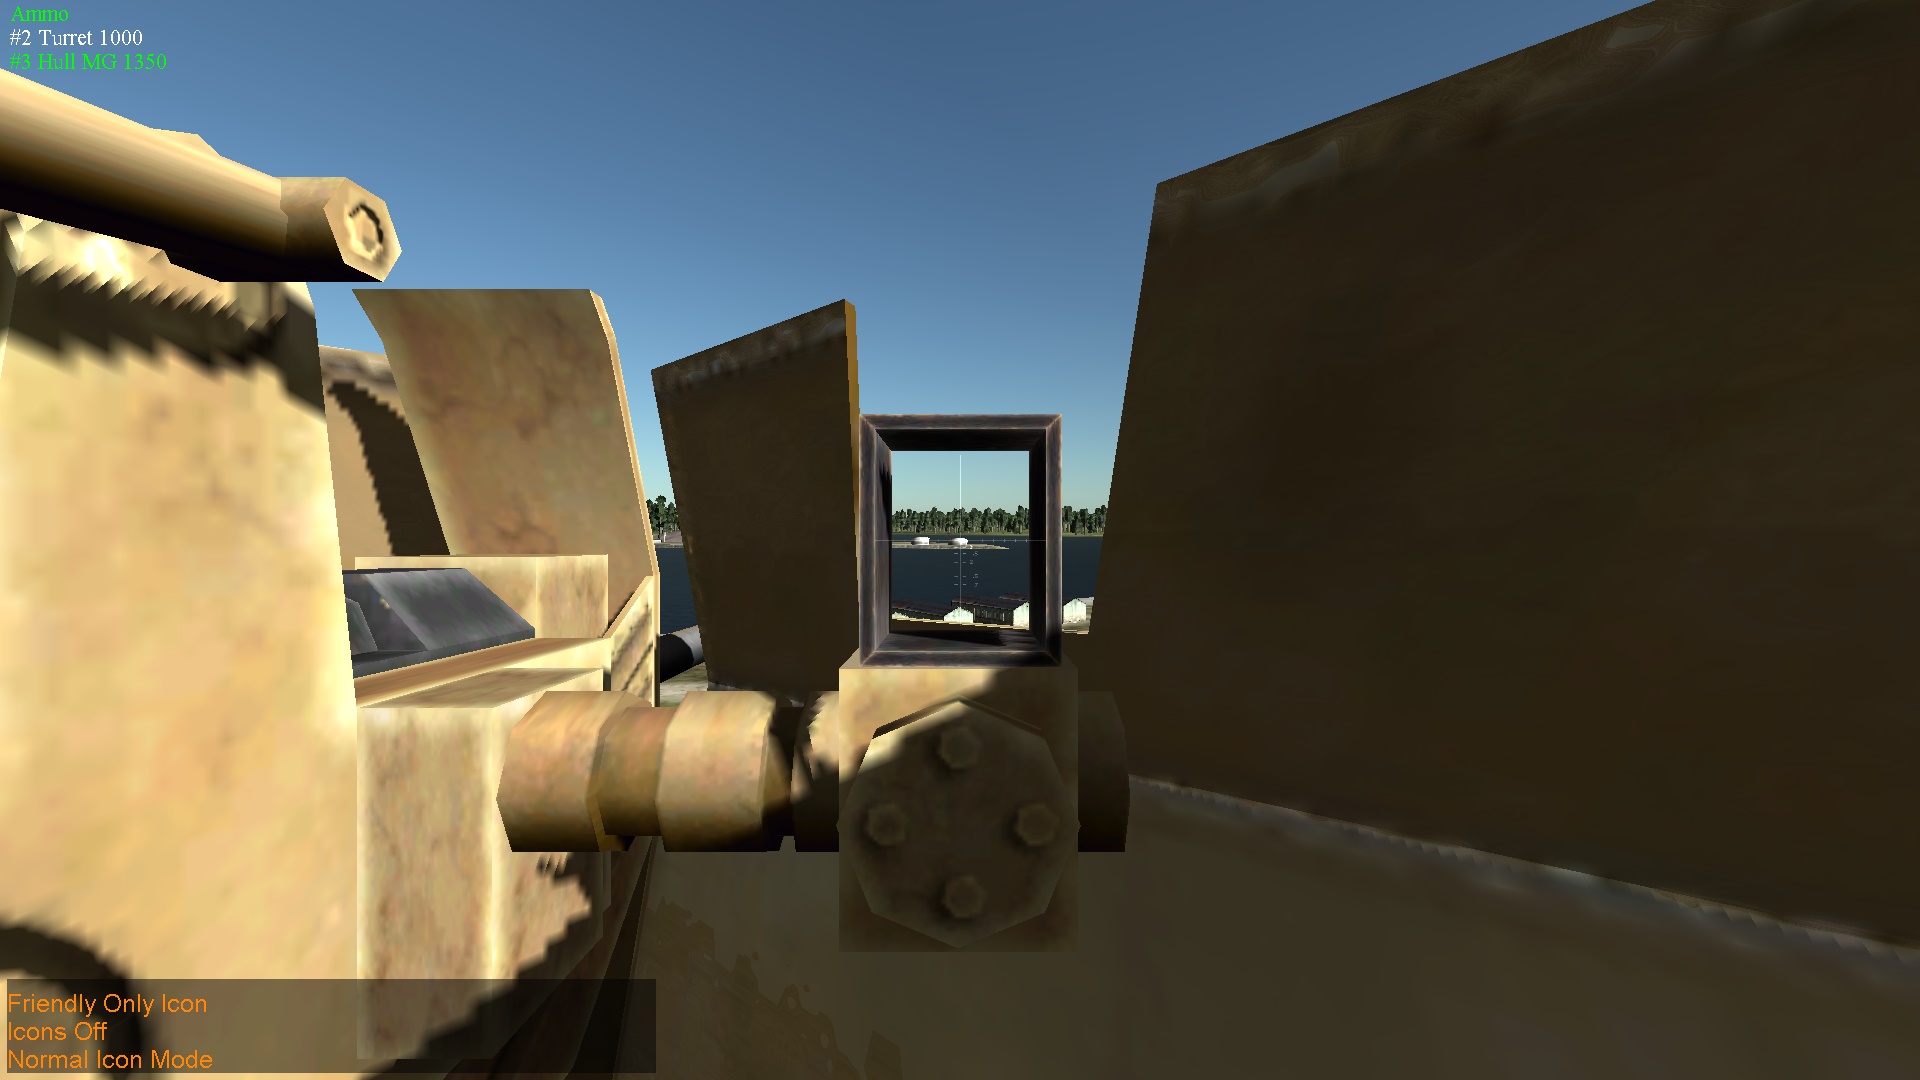 The picture to the right shows the sight picture from an Ostwind if it were shooting at ground targets. Note how much of your view is blocked by the turret. Even when the gun is elevated for air-to-air gunnery, much of your view is blocked by the sight itself. To optimize your view from this position, put the cursor on the crosshair as in the picture to the left below. Once you have done that, use the "Page Up" key to raise your head position to its maximum and hit "F10" to save it there. The picture below right is the same view with my head position raised to its maximum. Note that the cursor is still in the correct aiming point for the weapon. From this position, I can look over the armor of the turret and have a much better chance of spotting the enemy - especially if it is a ground vehicle. This technique also works with the iron sights of a machine gun. Additionally, sighting your cursor in on any weapon puts it in the right place for any other weapon. This is especially useful for the hull machine guns which have no sights .
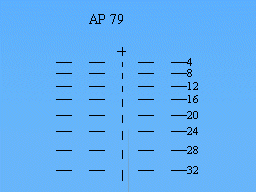 The sights found on the Panzer, M-8, LVTA4 and the Tiger simulate the gunner looking through an optical sight. The working part of the sight is the scale shown to the right. This consists of a center line and a scale showing various ranges in 100s of yards. This range scale adjusts depending on the type of ammunition you are using. Your sight also shows you the type of ammunition currently loaded (AP = armor piercing) and how many rounds of that type you have left (79). The [Backspace] key changes the ammo type.